

We have all been there: You capture what you think is the perfect moment, only to check your gallery and see that the subject is hidden in the shadows or washed out by blinding light. Lighting is the most critical element of photography, but it is also the hardest to control.
Whether you are dealing with underexposed (dark) or overexposed (too bright) images, you don't need expensive software to save your shot. With the YouCam Online Editor, you can balance light and color instantly using AI.
In this guide, we will cover how to fix these common lighting mistakes and, more importantly, share expert tips on how to avoid them in the future.
Understanding the Problem: Underexposed vs. Overexposed
Before fixing the image, it helps to understand what went wrong. In photography, "exposure" is the amount of light that reaches your camera's sensor.
- Underexposure (Too Dark): Not enough light hit the sensor. Details are lost in the shadows, and the image looks muddy or dull. This often happens indoors or when shooting against a bright window (backlighting).
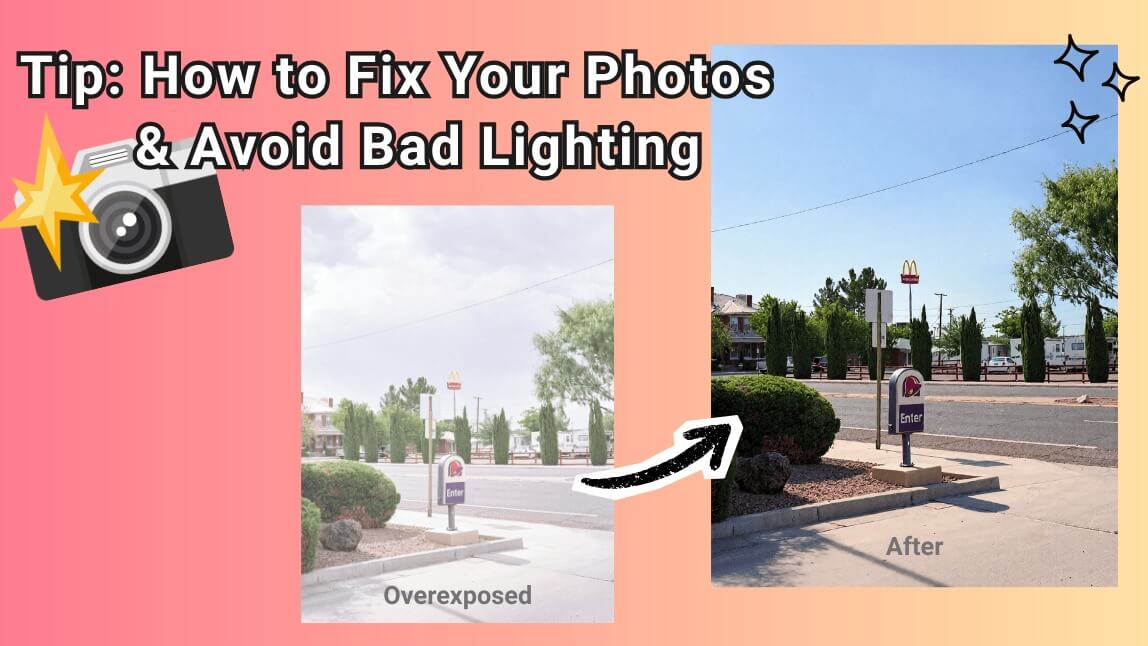
- Overexposure (Too Bright): Too much light hit the sensor. The highlights are "blown out," meaning white areas lose all detail. This is common in direct midday sunlight.
How to Fix Dark or Overexposed Photos Online
You don't need to understand histograms or curves to fix your photos. The YouCam Online Editor offers two powerful ways to correct lighting: AI Color Correction and manual Light Adjustments.
Follow these steps to rescue your photos:
- Upload Your Photo: Go to the YouCam Online Editor and upload the image you want to fix.
- Option A: One-Click AI Enhance: Got to "AI Lighting". The AI analyzes the scene and automatically balances brightness, contrast, and saturation. This is best for quick fixes.
- Option B: Manual Control: For precision, navigate to the "Basic Photo Editing" tab and use "Adjust Light & Color".
- To Fix Dark Photos: Increase Brightness and lower Contrast slightly to reveal details in the shadows.
- To Fix Overexposed Photos: Decrease Brightness and increase Highlights recovery to bring back detail in the bright areas.
- Download: Once satisfied, save your perfectly balanced image.
Pro Tips: How to Avoid Bad Lighting
While AI can work magic, the best photo is one that is shot correctly. Here are expert tips to help you master exposure before you even press the shutter button.
1. Master the "Tap to Focus" Rule
 ▲ Screenshot of Camera View iPhone 16 Pro.
On most smartphones, tapping the screen does two things: it focuses on the subject and sets the exposure for that spot.
The Trick: If your subject is dark, tap on them. The camera will brighten the image to make them visible. If the background is too bright, tap the bright area to lower the exposure.
2. Beware of Backlighting
Placing your subject in front of a window or the sun usually results in a silhouette (a dark subject).
The Fix: Move the light source! Ensure the light is hitting your subject's face, not the back of their head. If you must shoot against the light, turn on your camera's HDR (High Dynamic Range) mode or use a flash.
3. The Golden Hour Advantage
 ▲ Photo taken with iPhone 16Pro in the afternoon (left) and during Golden Hour (right).
Overexposure often happens at noon when the sun is harshest. Professional photographers prefer the "Golden Hour"—the first hour after sunrise and the last hour before sunset. The light is softer, diffused, and much harder to overexpose.
Why Use YouCam Online Editor for Light Correction?
Restoring a photo isn't just about making it brighter; it is about keeping it natural. Here is why YouCam is the preferred tool for fixing exposure:
- Smart AI Technology: It distinguishes between shadows and highlights, ensuring you don't "wash out" the photo while brightening it.
- Noise Reduction: Brightening a dark photo often introduces "grain" or digital noise. YouCam automatically smoothes this out.
- No App Required: Fix your photos directly in your browser, for free.
Frequently Asked Questions
Can I fix a photo that is completely black?
If a photo is 100% black (no data recorded), it cannot be fixed. However, if there are faint outlines visible, the YouCam AI Enhancer can often recover surprising amounts of detail from the shadows.
Does brightening a photo lower the quality?
Traditionally, yes. Increasing brightness can make a photo look grainy. However, YouCam uses AI to upscale and denoise the image simultaneously, preserving quality while fixing the lighting.
What is the difference between Brightness and Exposure?
Brightness makes the whole image lighter (including areas that are already white). Exposure simulates increasing the light captured by the camera, which affects the highlights and shadows more dynamically.
Rescue Your Photos with One Click
Don't delete those dark or washed-out memories. With the right tools, they can be transformed into professional-quality images. Try the YouCam Online Editor today and see the difference proper lighting makes.

